环境准备
- JDK1.8
- RHEL6.4
安装WebLogic
新建用户
groupadd -g 505 weblogic
useradd -g weblogic -u 505 weblogic
passwd weblogic
下载Weblogic
因weblogic被oracle收购,那么我们可以在Oracle官网下载weblogic
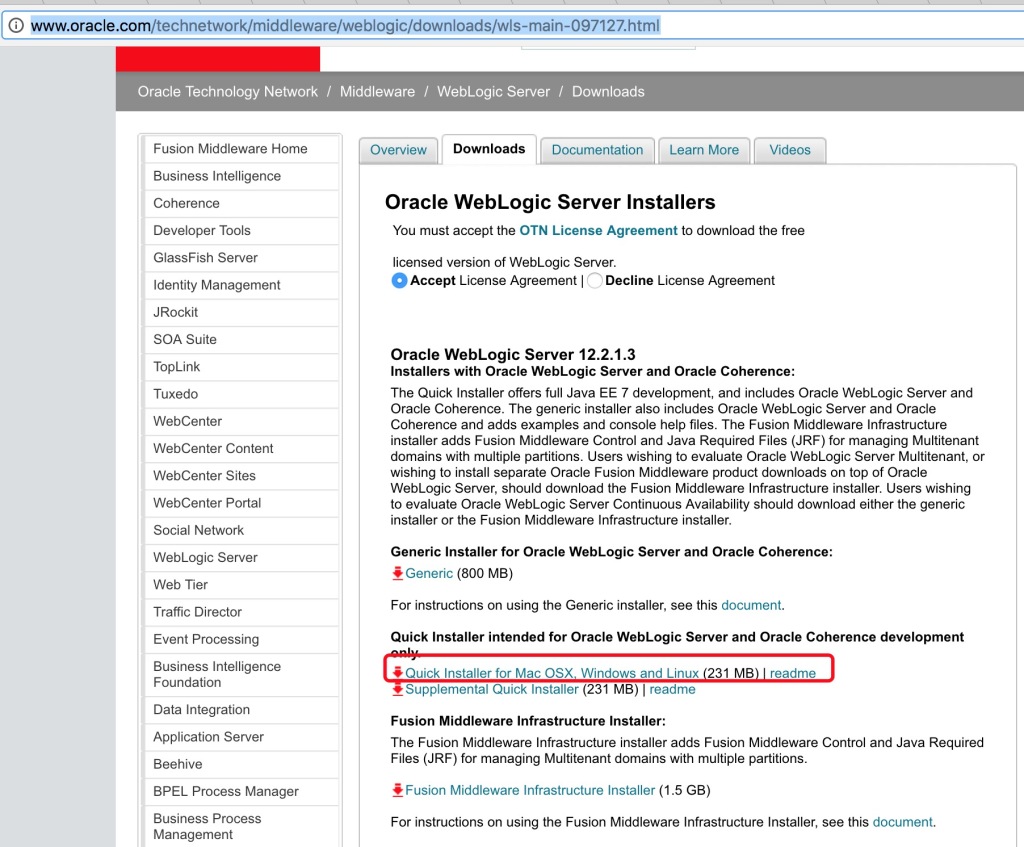
将下载好的安装包fmw_12.2.1.3.0_wls_quick_Disk1_1of1.zip进行解压
unzip fmw_12.2.1.3.0_wls_quick_Disk1_1of1.zip
解压完成后可以发现有个fmw_12.2.1.3.0_wls_quick.jar文件
预配置(可选)
在/home/weblogic下面新增oraInst.loc和wls.resp
oraInst.loc
inventory_loc=/home/weblogic/oraInventory
inst_group=weblogic
wls.resp
[ENGINE]

#DO NOT CHANGE THIS.
Response File Version=1.0.0.0.0

[GENERIC]

#The oracle home location. This can be an existing Oracle Home or a new Oracle Home
ORACLE_HOME=/home/weblogic/weblogic

#Set this variable value to the Installation Type selected. e.g. WebLogic Server, Coherence, Complete with Examples.
INSTALL_TYPE=WebLogic Server

#Provide the My Oracle Support Username. If you wish to ignore Oracle Configuration Manager configuration provide empty string for user name.
MYORACLESUPPORT_USERNAME=

#Provide the My Oracle Support Password
MYORACLESUPPORT_PASSWORD=<SECURE VALUE>

#Set this to true if you wish to decline the security updates. Setting this to true and providing empty string for My Oracle Support username will ignore the Oracle Configuration Manager configuration
DECLINE_SECURITY_UPDATES=true

#Set this to true if My Oracle Support Password is specified
SECURITY_UPDATES_VIA_MYORACLESUPPORT=false

#Provide the Proxy Host
PROXY_HOST=

#Provide the Proxy Port
PROXY_PORT=

#Provide the Proxy Username
PROXY_USER=

#Provide the Proxy Password
PROXY_PWD=<SECURE VALUE>

#Type String (URL format) Indicates the OCM Repeater URL which should be of the format [scheme[Http/Https]]://[repeater host]:[repeater port]
COLLECTOR_SUPPORTHUB_URL=
安装weblogic
执行如下命令:
java -jar -d64 fmw_12.2.1.3.0_wls_quick.jar -silent -invPtrLoc /home/weblogic/oraInst.loc -responseFile /home/weblogic/wls.resp
或者直接执行
java -jar fmw_12.2.1.3.0_wls_quick.jar
此时会打印如下日志:
Launcher log file is /tmp/OraInstall2018-02-05_11-39-28AM/launcher2018-02-05_11-39-28AM.log.
Extracting the installer . . . . . Done
Checking if CPU speed is above 300 MHz.   Actual 2266.000 MHz    Passed
Checking swap space: must be greater than 512 MB.   Actual 4095 MB    Passed
Checking if this platform requires a 64-bit JVM.   Actual 64    Passed (64-bit not required)
Checking temp space: must be greater than 300 MB.   Actual 121215 MB    Passed
Preparing to launch the Oracle Universal Installer from /tmp/OraInstall2018-02-05_11-39-28AM
Log: /tmp/OraInstall2018-02-05_11-39-28AM/install2018-02-05_11-39-28AM.log

*****************************************************

Distribution Name : Oracle Fusion Middleware 12c WebLogic and Coherence Developer
Distribution Version : 12.2.1.3.0

Oracle Inventory : /home/weblogic/oraInventory

Oracle Home : /home/weblogic/wls12213
Java Home : /usr/local/java/jdk1.8.0_161

Note: Oracle Home not supplied (defaulted to <present working dir>/wls12213)

*****************************************************

Copyright (c) 1996, 2017, Oracle and/or its affiliates. All rights reserved.
Reading response file..
Skipping Software Updates
Starting check : CertifiedVersions
Expected result: One of oracle-6, oracle-7, redhat-7, redhat-6, SuSE-11, SuSE-12
Actual Result: redhat-6.4
Check complete. The overall result of this check is: Passed
CertifiedVersions Check: Success.

Starting check : CheckJDKVersion
Expected result: 1.8.0_131
Actual Result: 1.8.0_161
Check complete. The overall result of this check is: Passed
CheckJDKVersion Check: Success.

Validations are enabled for this session.
Verifying data
Copying Files
Percent Complete : 10
Percent Complete : 20
Percent Complete : 30
Percent Complete : 40
Percent Complete : 50
Percent Complete : 60
Percent Complete : 70
Percent Complete : 80
Percent Complete : 90
Percent Complete : 100

The installation of Oracle Fusion Middleware 12c WebLogic and Coherence Developer 12.2.1.3.0 completed successfully.
Logs successfully copied to /home/weblogic/wls12213/cfgtoollogs/oui.
至此,Weblogic已经安装完成。
配置域
命令行方式配置域
配置域
cd wls12213/
oracle_common/common/bin/commEnv.sh
oracle_common/common/bin/wlst.sh
Initializing WebLogic Scripting Tool (WLST) ...

Welcome to WebLogic Server Administration Scripting Shell

Type help() for help on available commands

wls:/offline>  readTemplate('/home/weblogic/wls12213/wlserver/common/templates/wls/wls.jar')
WARNING: The readTemplate is deprecated. Use selectTemplate followed by loadTemplates in place of readTemplate.
wls:/offline/base_domain>cd('Servers/AdminServer')
wls:/offline/base_domain/Server/AdminServer>set('ListenAddress','')
wls:/offline/base_domain/Server/AdminServer>set('ListenPort', 7001)
wls:/offline/base_domain/Server/AdminServer>cd('../..')
wls:/offline/base_domain>cd('Security/base_domain/User/weblogic')
wls:/offline/base_domain/Security/base_domain/User/weblogic>cmo.setPassword('weblogic123')
wls:/offline/base_domain/Security/base_domain/User/weblogic>setOption('OverwriteDomain', 'true')
wls:/offline/base_domain/Security/base_domain/User/weblogic>writeDomain('/home/weblogic/user_projects/domains/test')
wls:/offline/test/Security/test/User/weblogic>closeTemplate()
wls:/offline>exit()

Exiting WebLogic Scripting Tool.
启动nodeManager和weblogic
cd ~/user_projects/domains/test/bin

nohup sh startWebLogic.sh &

nohup sh startNodeManager.sh &
GUI方式配置域
安装VNC
yum install tigervnc
yum install tigervnc-server
配置X11
使用操作用户(weblogic)登录远程机器,切记一定会weblogic用户,不可使用其他用户通过su命令切换。
然后执行如下命令
export DISPLAY=:0
此时,便可以使用操作机的X11客户端去安装Weblogic了。
使用XQuartz登录远程机器
ssh -X weblogic@OP-APM-05
Step01-启动配置GUI
cd ~/wls12213

oracle_common/common/bin/config.sh
如下图所示
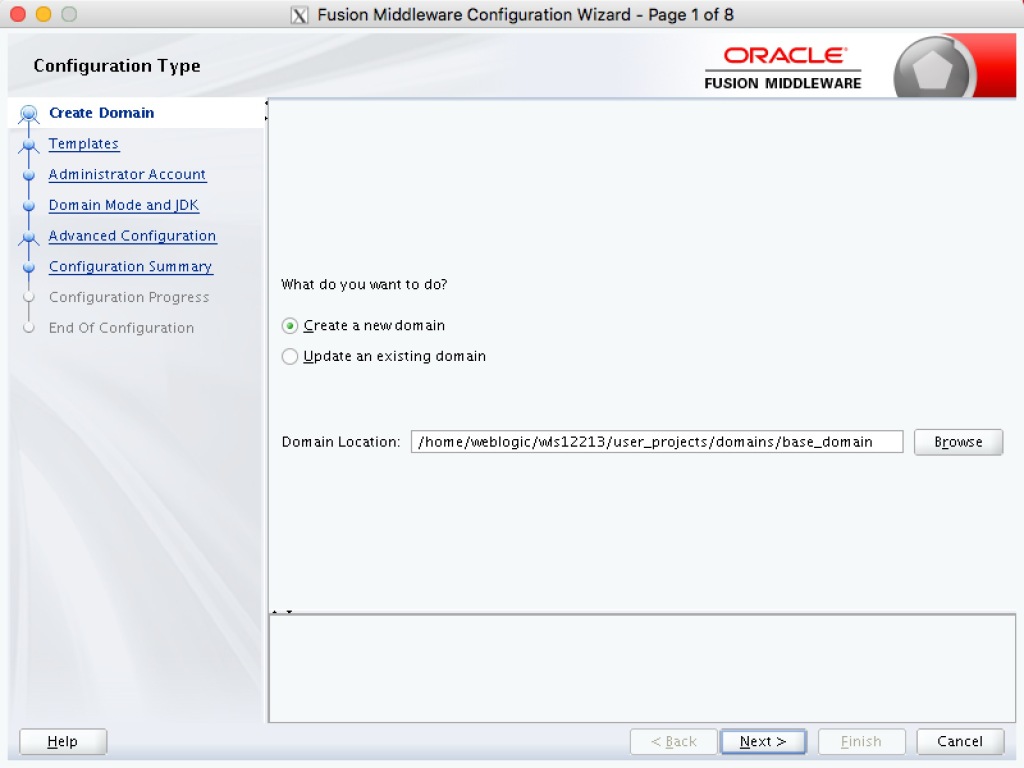
此时我们选择Create a new domain。
Step02-Templates
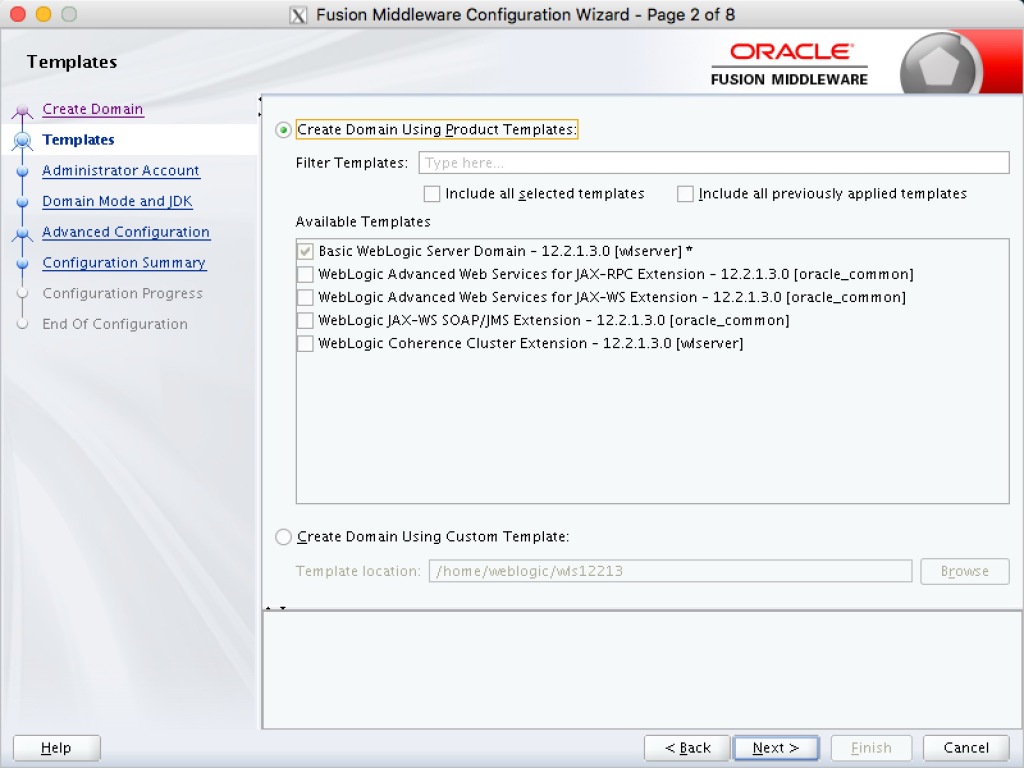
此时我们按照图中所示,点击Next >。
Step03-Admin Account
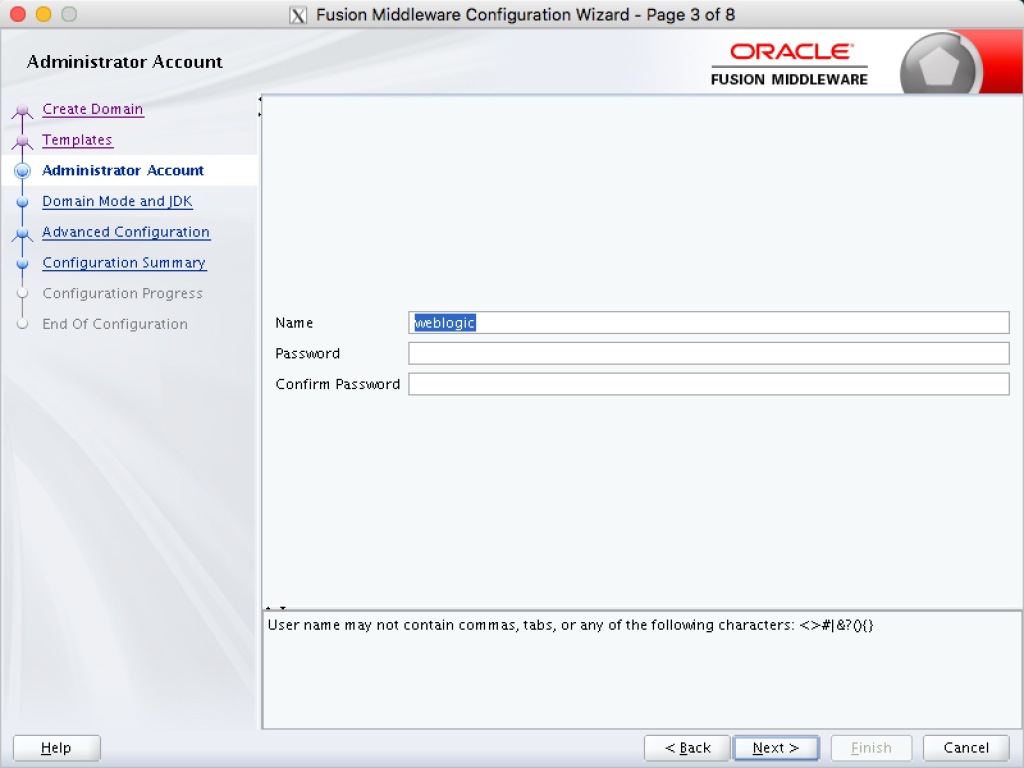
此处,我们配置管理员的账号,用户名weblogic ,密码weblogic123。
Step04-Domain Mode And JDK
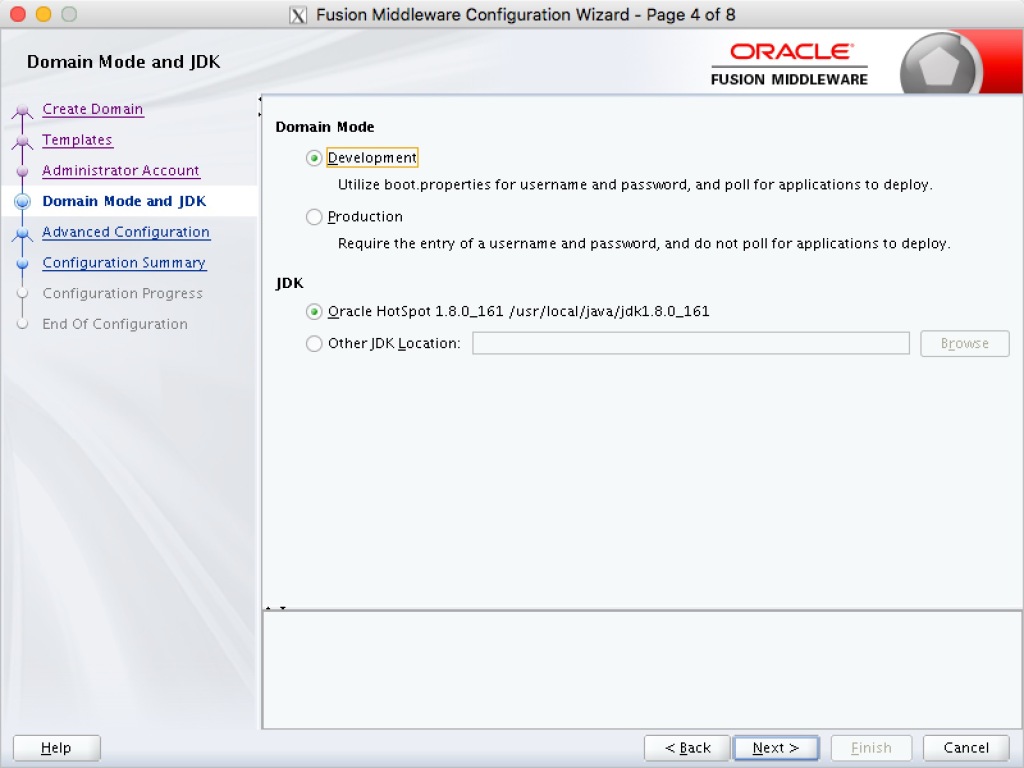
因是测试环境,我们选择Development,JDK选择默认系统配置的JAVA_HOME。
Step05-Advanced Config
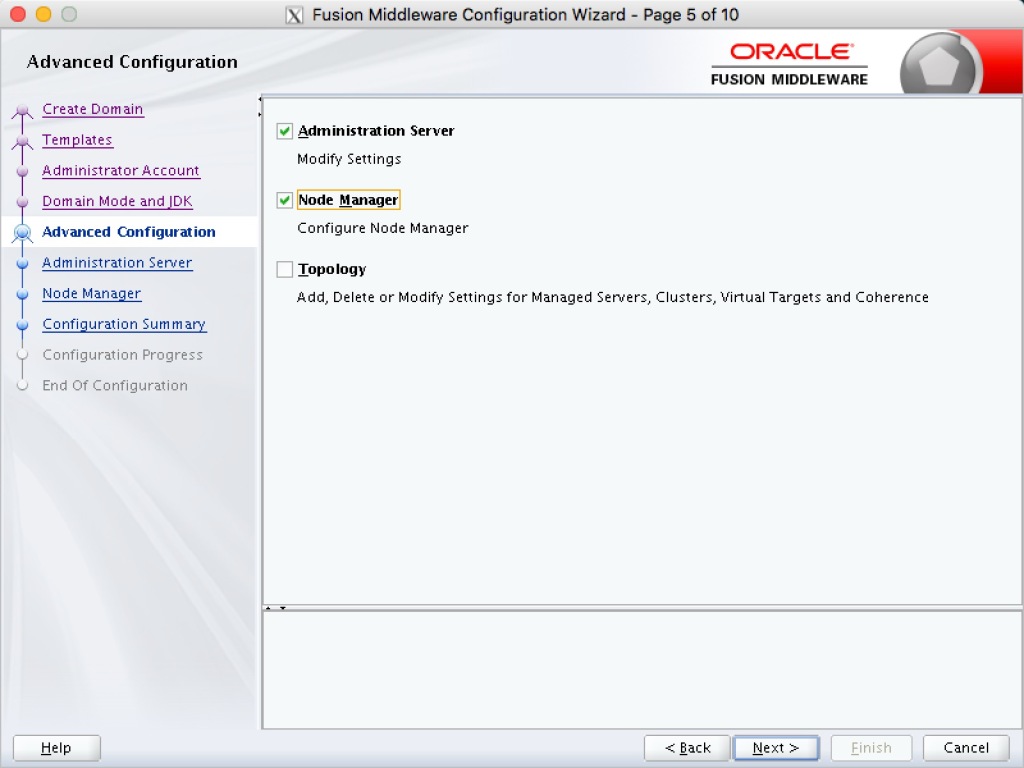
在这里,选择Administration Server和Node Manager即可。
Step06-Administration Server
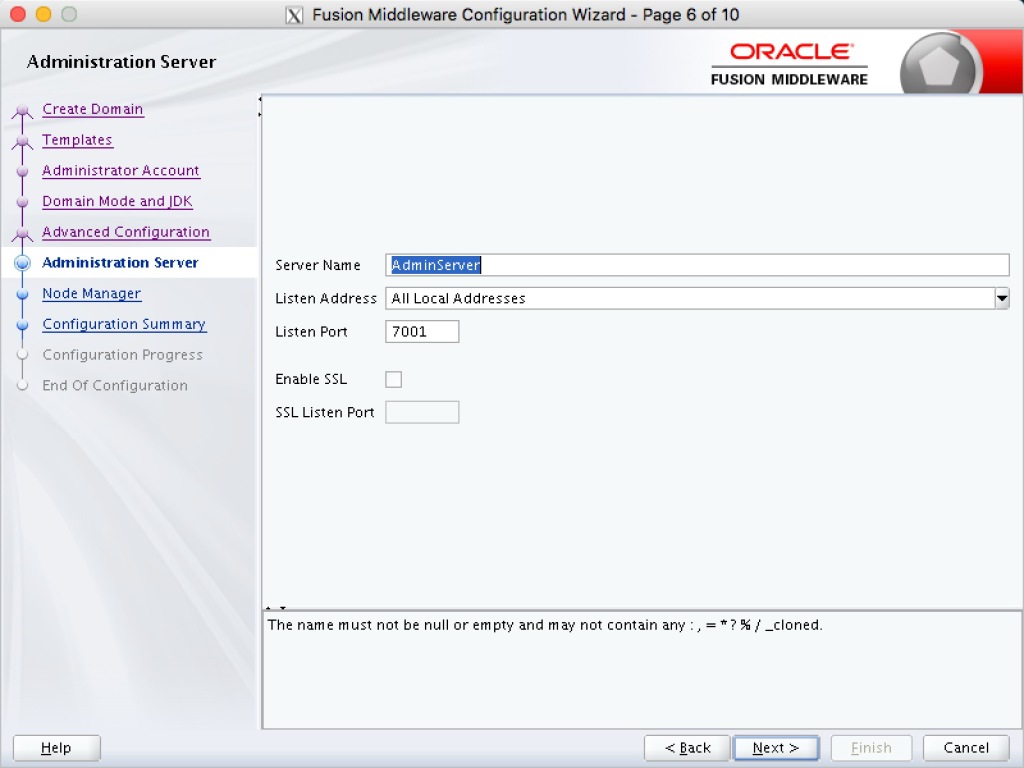
ServerName: 应用名称
Listen Address :测试环境一般推荐All Local Address,将所有的地址都绑定了。
Listen Port: 一般从7001开始,本次我们就是用7001
SSL的配置可以不勾选,测试环境没必要。
Step07-Node Manager
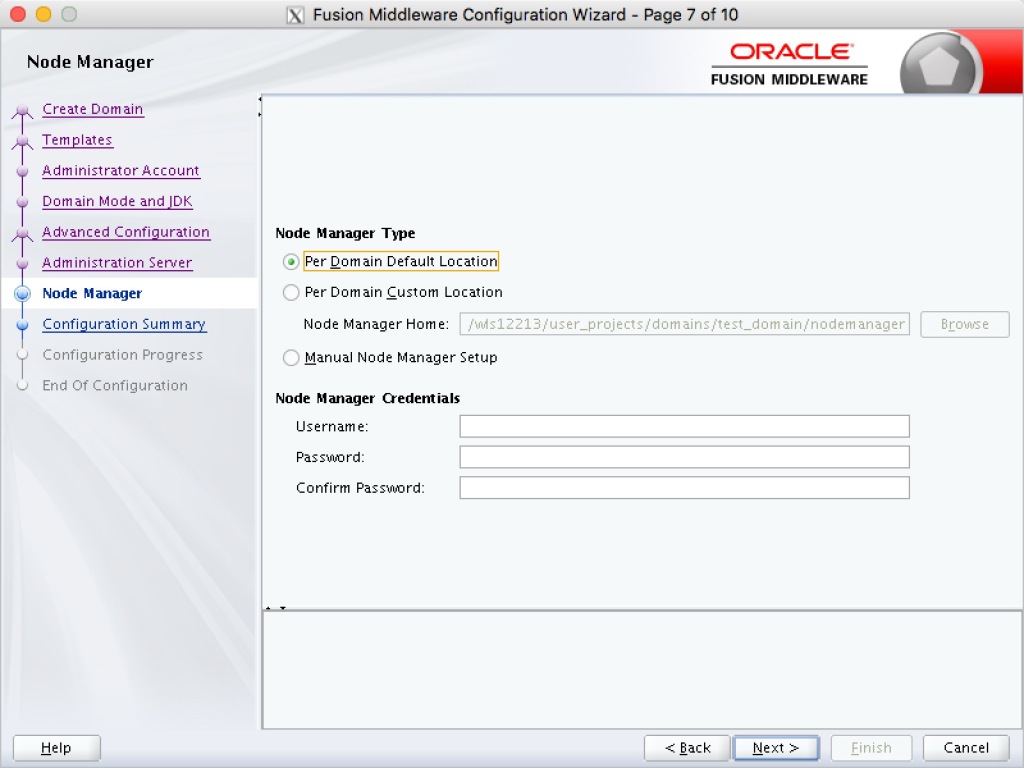
这一步配置Node Manager,Location我们就选择默认即可,默认的路径在~/wls12213/user_projects/
在下面的Node Manager Credentials中填写用户名密码,本篇的用户名密码是weblogic和weblogic123。
Step08-Configuration Summary
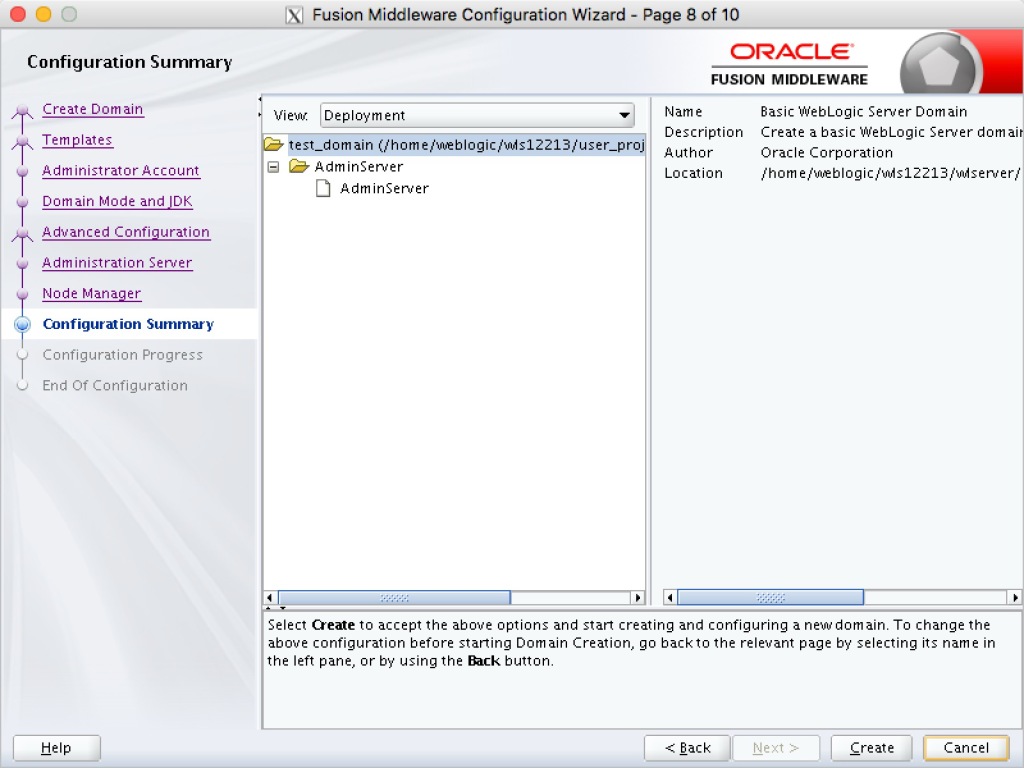
这一步点击Create即可。
Step09-Configuration Summary
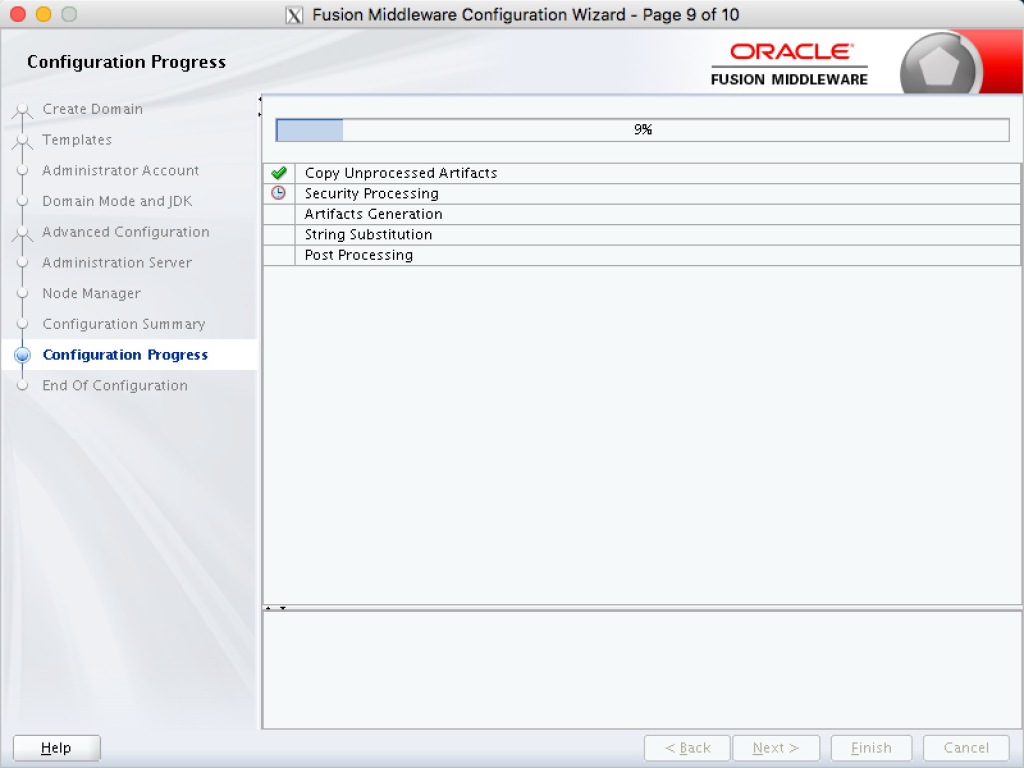
Step10-End Of Configuration

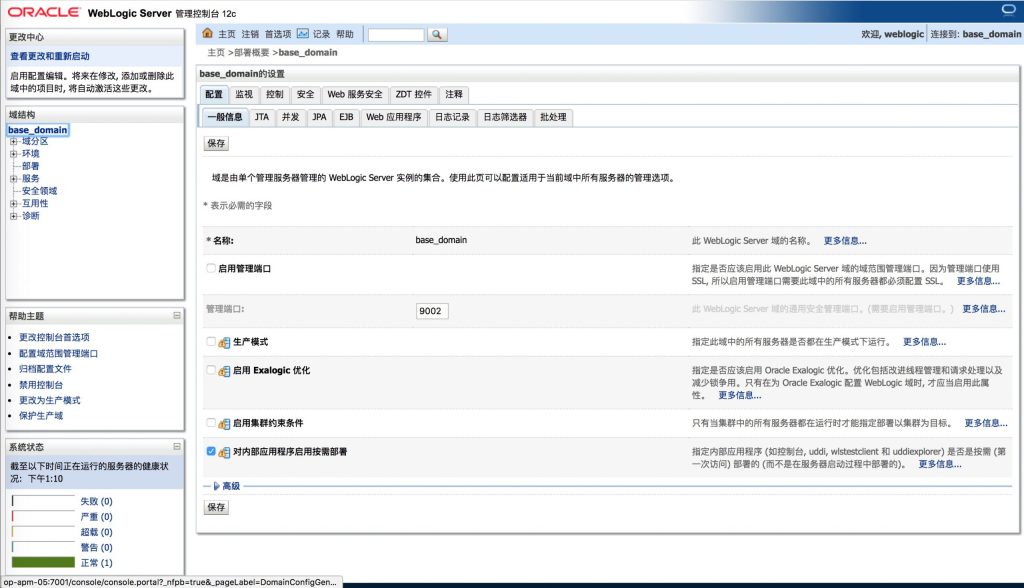
启动weblogic Server
cd ~/wls12213/user_projects/domains/base_domain

nohup sh startWebLogic.sh &
等待大约10分钟就启动完成了。